

Let’s learn explore to vesting MICS in this article.
1. How to get wallet address
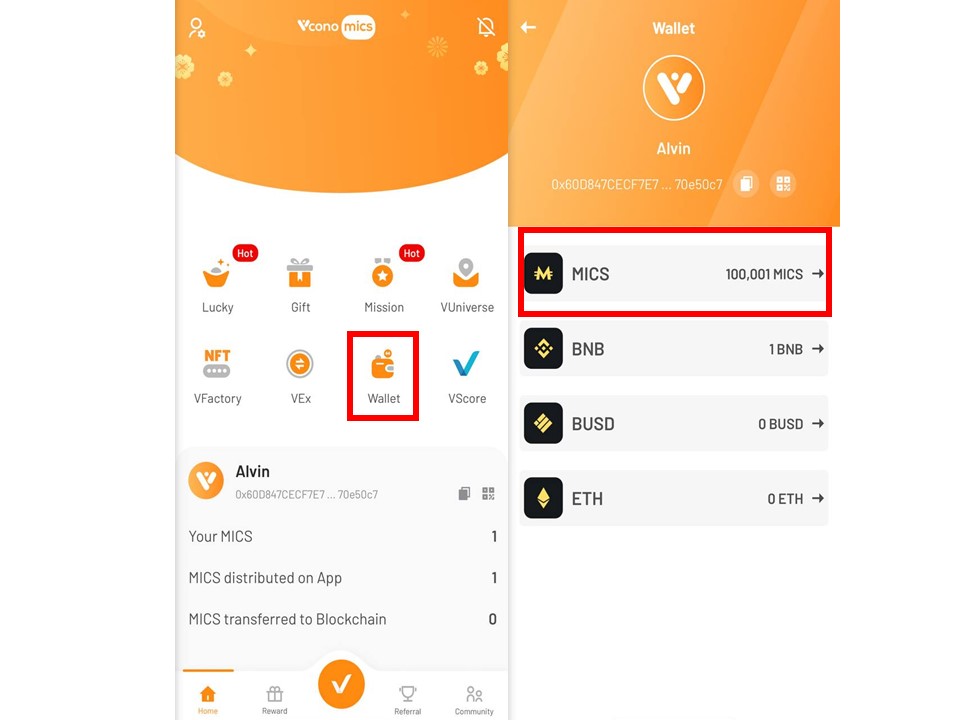
Step 1: Select “Wallet”.
Step 2: Choose “MICS” to get your wallet address.
Step 3: Click “Receive”.
Step 4: You can choose “Save Image” to save QR code or “Share address” to copy and share wallet address.

2. How to vesting MICS
Step 1: Select “Wallet”.
Step 2: Choose “MICS” to vesting MICS.
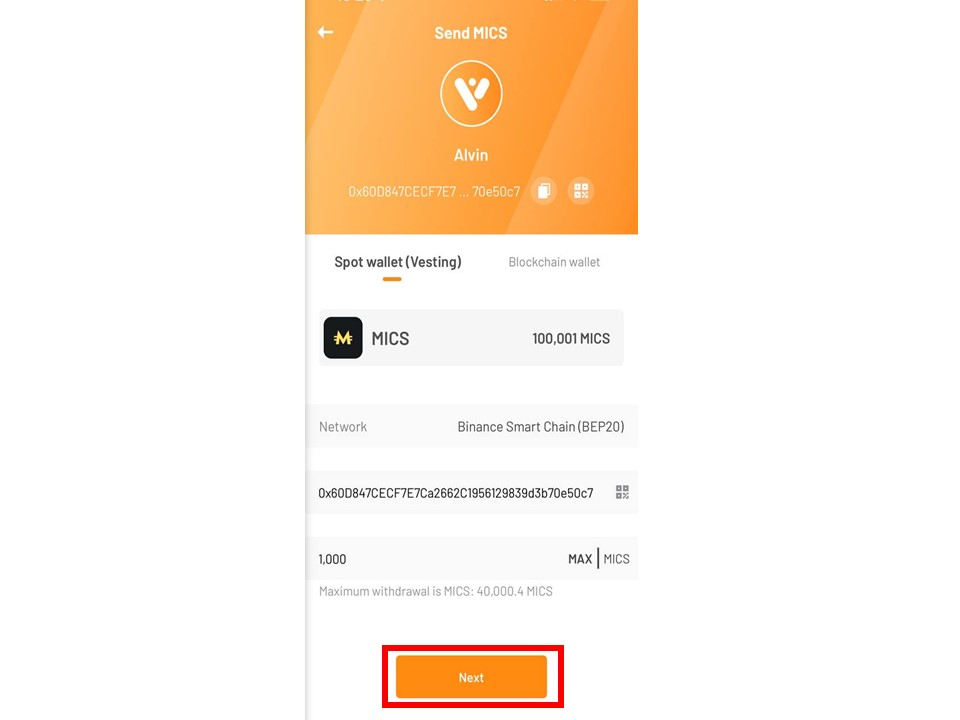
Step 3: Click “Send” and “Spoting Wallet (Vesting)”.

Step 4: Enter receiver’s wallet address and number of MICS which you want vesting.
Note:
- KYC verified and 2FA enabled are required. Refer: How to enable two-factor authentication through Email and Google Authenticator.
- From 11 May 2022, vesting can be done automatically and unlimitedly
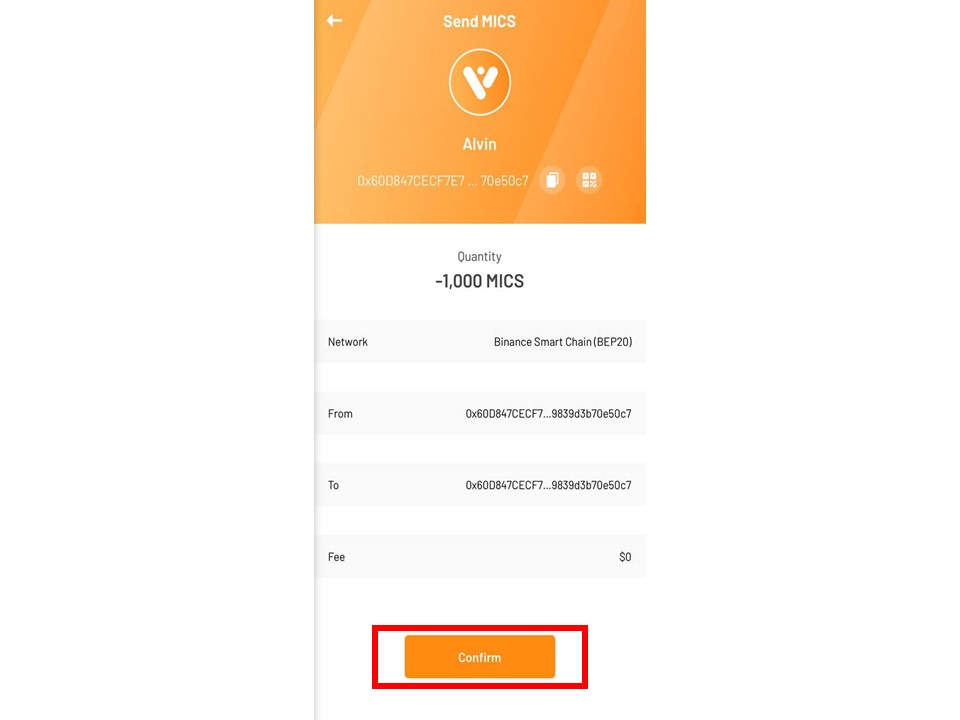
Step 5: If KYC verified and 2FA enabled, vesting information will appear. Press “Confirm”.
Step 6: Copy verify code from Email and Google Authenticator and paste to Vconomics. Click “Submit”.

Step 7: Successful notification will appear. Press “Confirm”.
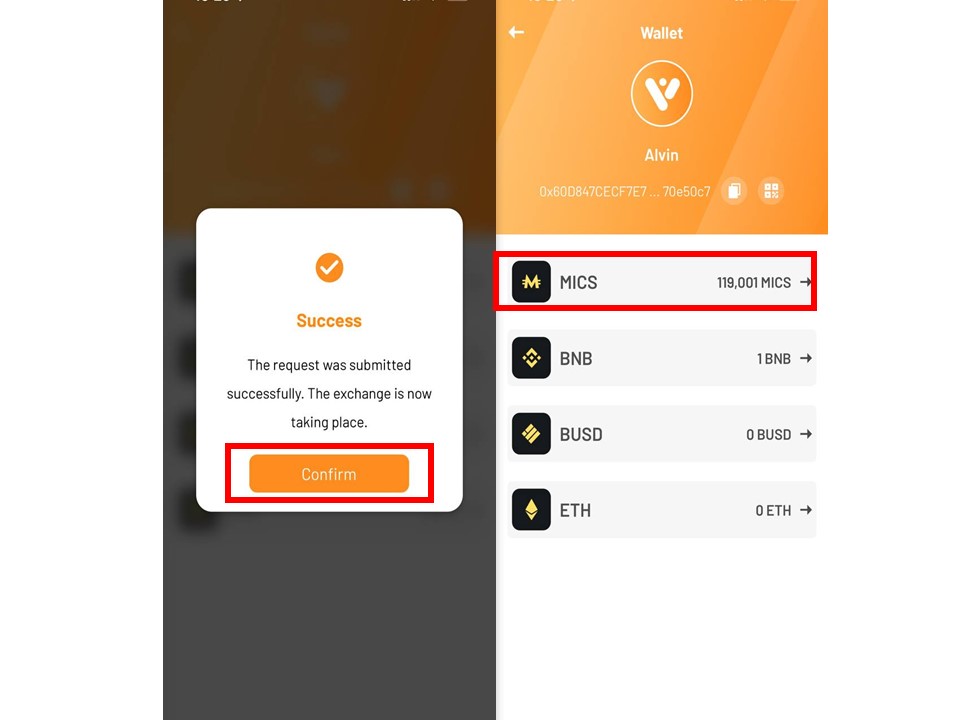
Step 8: Choose “MICS” to check transaction history. Transaction status is “In Progress”.
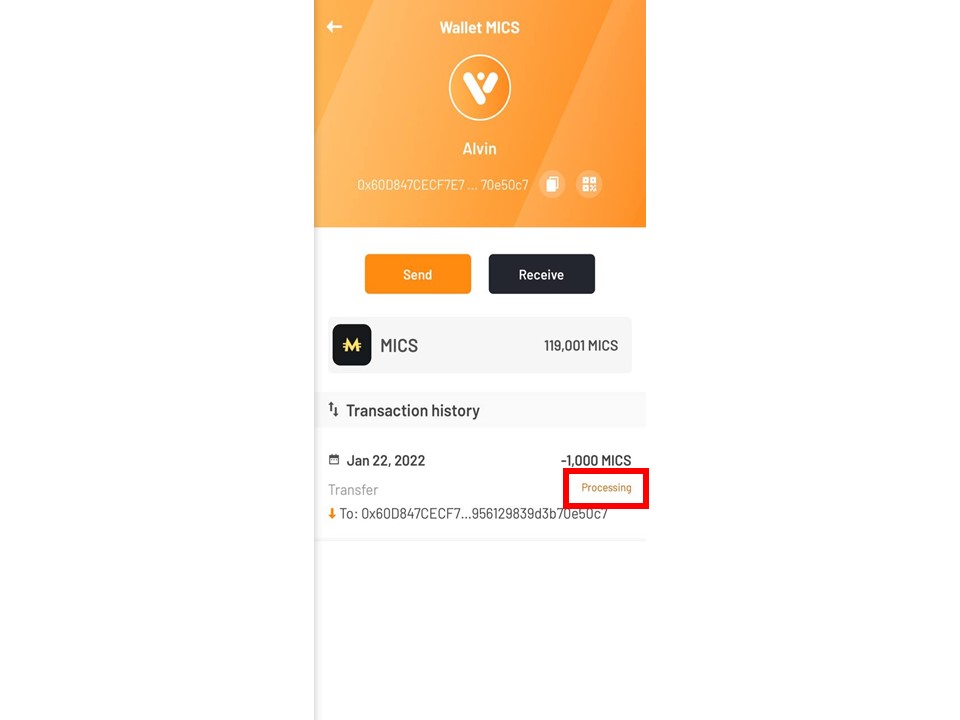
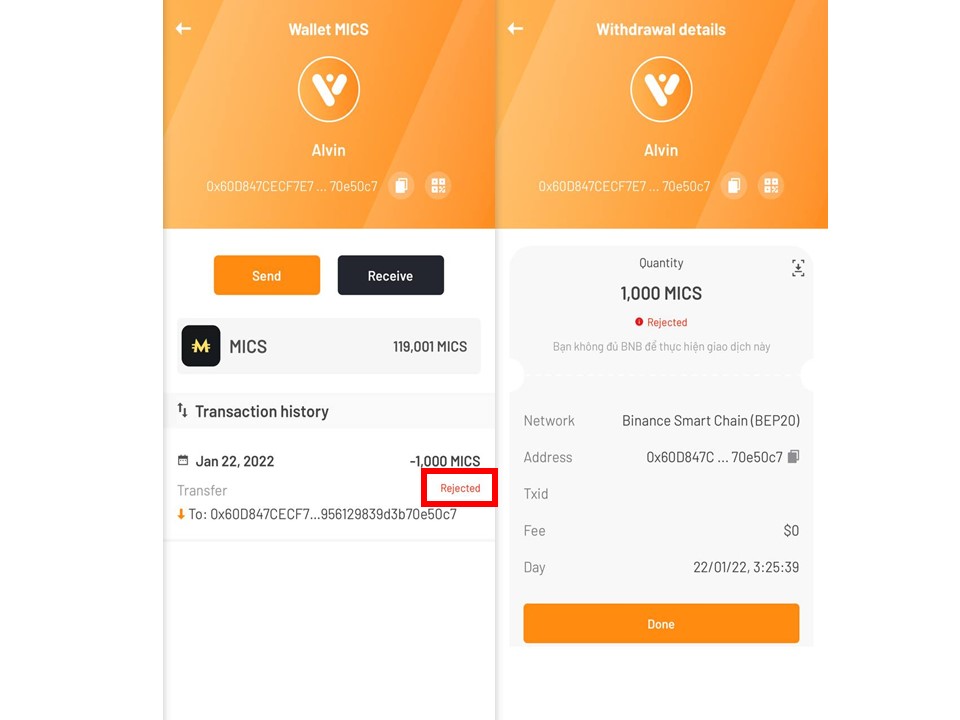
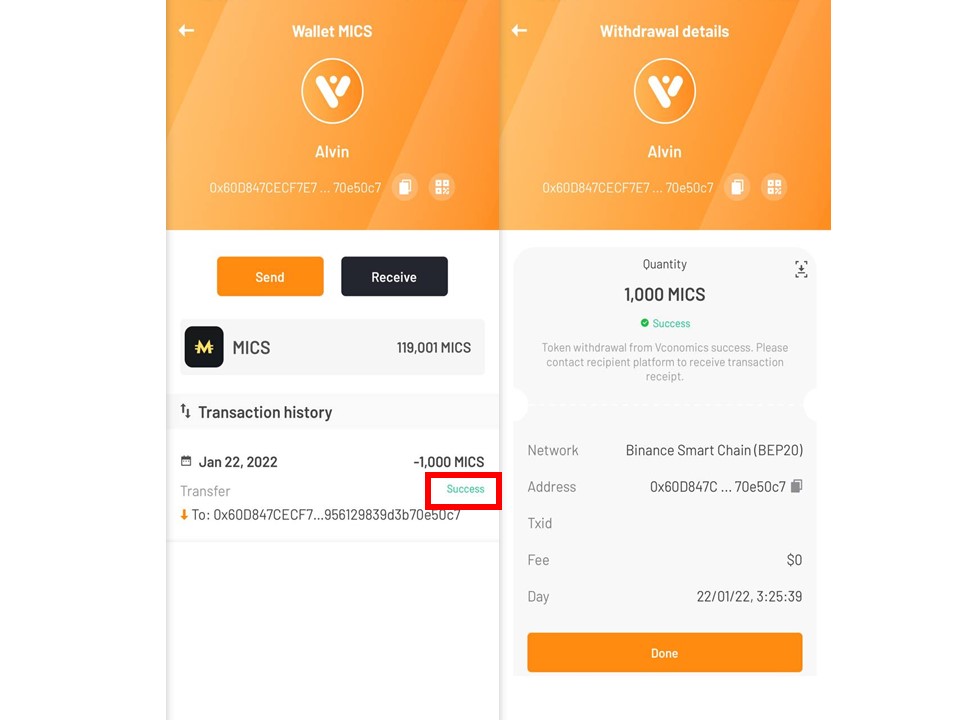
Step 9: System will process your transaction and update status.
Within a few simple steps, you can vesting MICS.
Do not hesitate to contact Vconomics team if you have any questions.
Download Vconomics and get FREE MICS !


Join Vconomics channels to get extra FREE MICS
Telegram – Facebook – Twitter – Medium – Tiktok – Instagram – Youtube
Website: https://vconomics.io
Email: [email protected]